Welcome
to SpyAgent's 10 Step Guide to Total Stealth. With this
guide you should have SpyAgent up and running in total
stealth in minutes!
Note: If you are using SpyAgent Stealth
Edition you DO NOT need to use this installation guide, as
SpyAgent Stealth is already optimally configured for stealth.
Click
here to Get Started!
|
Jump
to Step: 1 - 2 - 3 - 4 - 5 - 6 - 7 - 8 - 9 - 10
|
Step
1
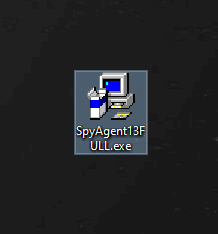
After downloading your copy of SpyAgent
navigate to where you downloaded (in this case it
is on the Windows desktop). Double click the SpyAgent
installer file to start the SpyAgent install.
NOTE:
After install is complete you can delete this file |
Next Step | Back to Top
|
Step
2
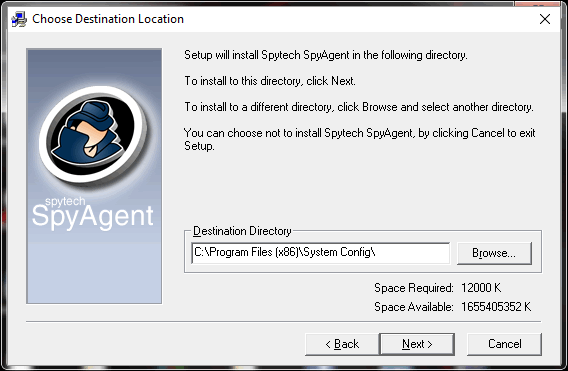
Click through the installer until you come to this screen.
This is where you choose the folder location for SpyAgent's
install. We recommend you change this from the default (c:\program
files\sysconfig\ or c:\program files (x86)\sysconfig\ if on a 64-bit computer.) to the path below,
or something of your own making. Make sure you remember this
path to access the software.
Once
you configure the Destination Directory, click the Next
button.
|
Next Step | Back
to Top
|
Step
3
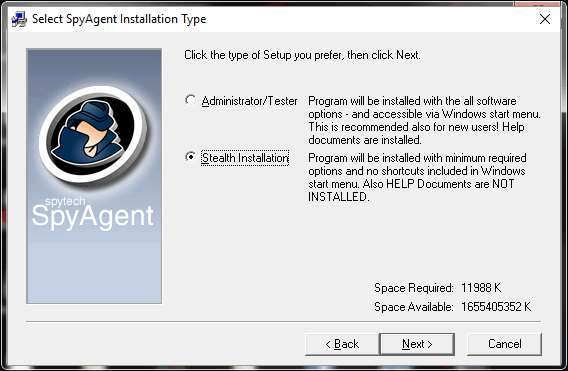
Click through the installer until
you come to this screen. This is where you choose
the install type for SpyAgent. If you want SpyAgent
to not appear in the start menu and install the bare
minimum files then choose the Stealth installation,
as shown below. Click Next when you have done so.
|
Next Step | Back
to Top
|
Step
4
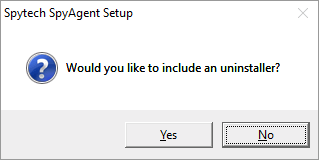
When you are done configuring the
install you will be asked if you want to include
an uninstaller. For total stealth choose NO - as
shown.
|
Next Step | Back
to Top
|
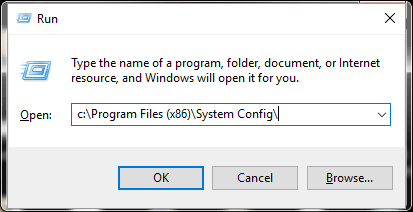
Step
5
After your install completes you will now
have to configure and run SpyAgent! Go to the START
button on your desktop and click it once to bring
up the Start menu. Choose the RUN... option to get
the below window. You will have to enter your installation
path (this is the same path from the installer that
you just entered!) When you have entered it press
OK.
|
Next Step | Back
to Top
|
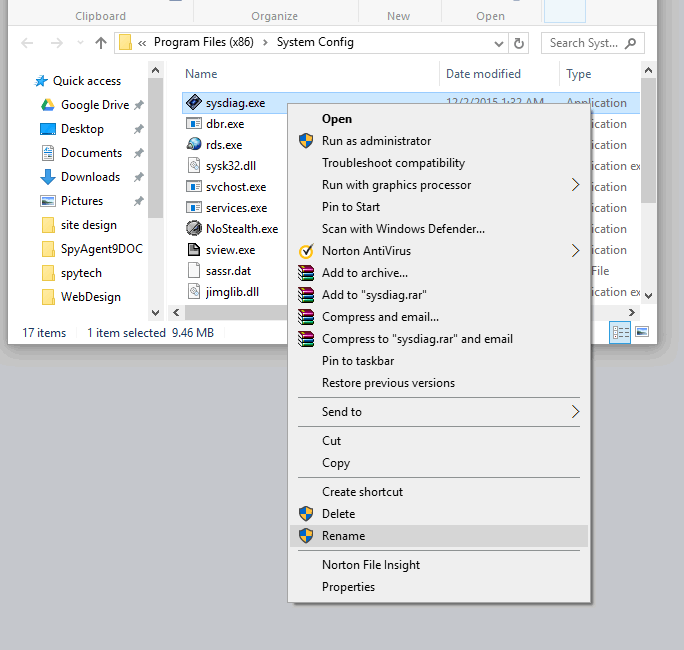
Step
6 (optional)
Once you are in the install directory you will
see the SpyAgent files below if you have chosen Stealth install.
Now, Highlight the sysdiag application file as shown below.
|

Next Step | Back
to Top
|
Step
7 (optional)
Right click on the sysdiag application file
(sysdiag.exe if you have Windows set to show file extensions)
and choose RENAME from the menu by clicking on it.
|
Next Step | Back
to Top
|
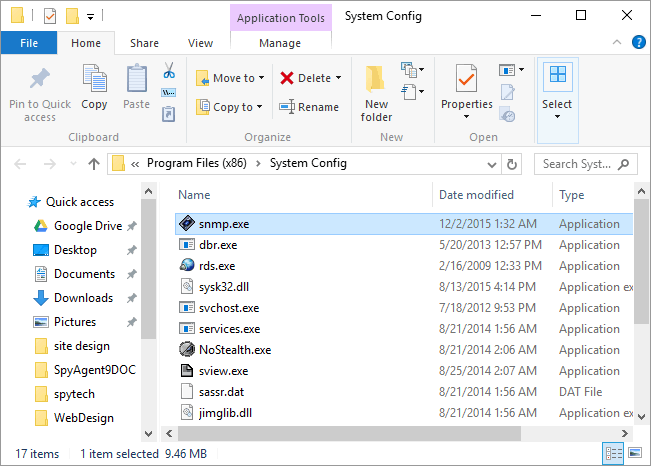
Step
8 (optional)
You will now be able to type a new name in
for sysdiag. As you can see below we chose to name it "snmp".
Use the below name, or something of your making to conceal
SpyAgent's identity.
|
Next Step | Back
to Top
|
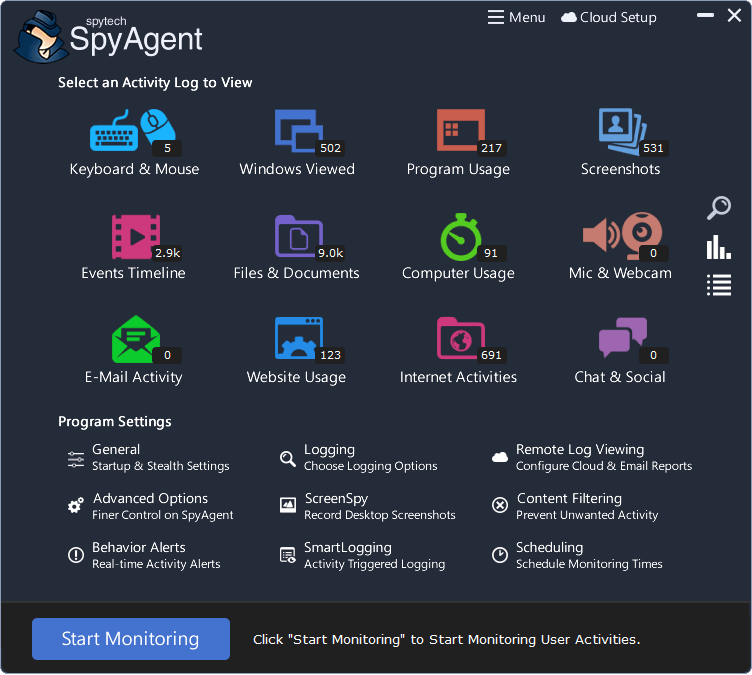
Step
9
After renaming you can now run SpyAgent by
double clicking the file you renamed. You will be prompted
to configure your password - do so. Once inside SpyAgent click
on the 'GENERAL' button on the right side of the SpyAgent
window. The below window will appear - enable the options
exactly as you see in the below window.
After
you configure the General options you can click the LOGGING OPTIONS section and configure the logging options as well. When you are
done click OK to save your settings.
|

Next Step | Back
to Top
|
Step
10
Almost done! Now all that is left to do is
click the Start Monitoring button on the SpyAgent window.
You will be prompted for your password - enter it, and click
OK. You will receive a notification message on how to bring
SpyAgent out of stealth mode to later view logs - read this
message carefully, and check the 'Do Not Show this Help Tip Again' box to hide the tip popup in the future!
Now
SpyAgent is in total stealth. When you restart your PC it
will run invisibly as well. To stop stealth mode run the nostealth.exe
in the SpyAgent installation directory, or press CONTROL+SHIFT+ALT+M
on your keyboard to bring up the password window.
If
you have any questions check out the SpyAgent FAQ at www.spytech-web.com/help/spyagentfaq.shtml
|
Back
to Top |
| |
