|
|
SpyAgent has been designed to be extremely easy to use and configure. Setting up SpyAgent will only take you a few minutes and then you will be ready to start monitoring! This quick guide will walk you through setting up and getting SpyAgent ready. How SpyAgent works... For SpyAgent to work it must be running - if you close SpyAgent it will not be able to continue monitoring your computer. SpyAgent can be manually started at anytime by double clicking its icon in its installation folder. Installing SpyAgent Running SpyAgent for the first time
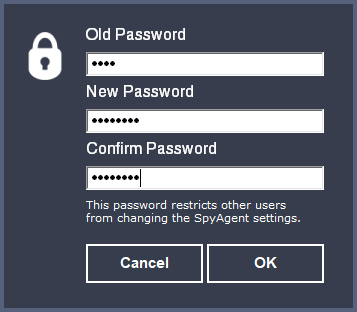
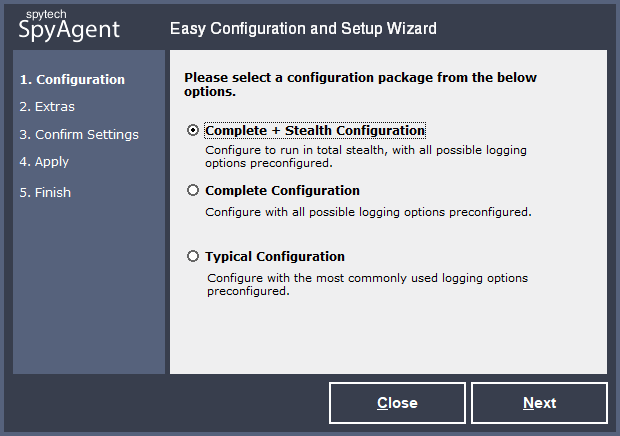
Once you have your password set you will be presented with the easy configuration wizard, as shown here:
This wizard will allow you to quickly select the basic feature-set for SpyAgent to use - from logging options, to remote log delivery. Once you finish with the wizard you will be presented with SpyAgent's user interface. SpyAgent can now be further configured in more detail from SpyAgent's interface. Continue below to take a quick tour of SpyAgent's interface. The SpyAgent Graphical User Interface
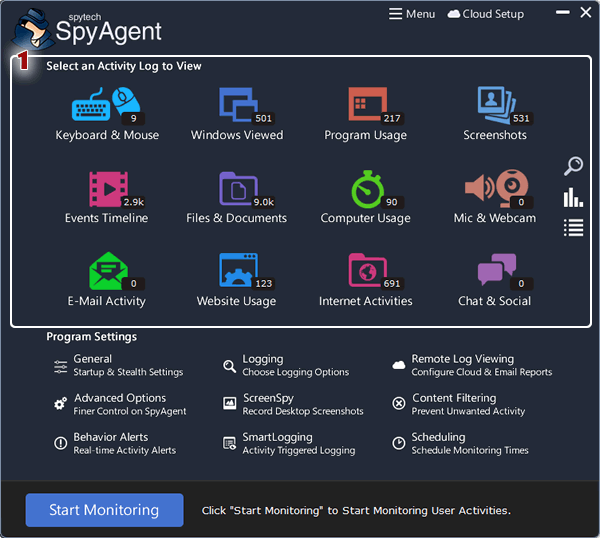
The highlighted area above signifies where you view
SpyAgent's activity logs. To view logs, simply click on any specific
category to launch SpyAgent's built in log viewer for that activity
log. If you wanted to view Programs that were ran, for example,
you would click on 'Programs Executed'. Within each log viewer you
can export and save logs, clear them, and even perform powerful
filtering and cross-referencing actions that allow you to correlate
all your log data based around related events.
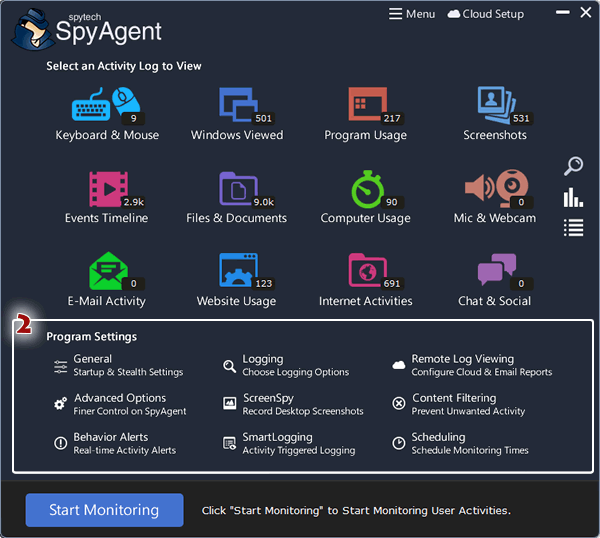
The highlighted area above signifies where you configure
SpyAgent's features. Clicking on any of the areas in this section
will launch various configuration screens to further adjust and
customize SpyAgent's operations. For example, to change SpyAgent's
logging options you would click on 'Logging'. For further information
on customizing SpyAgent's logging options please see the configuring
logging section.
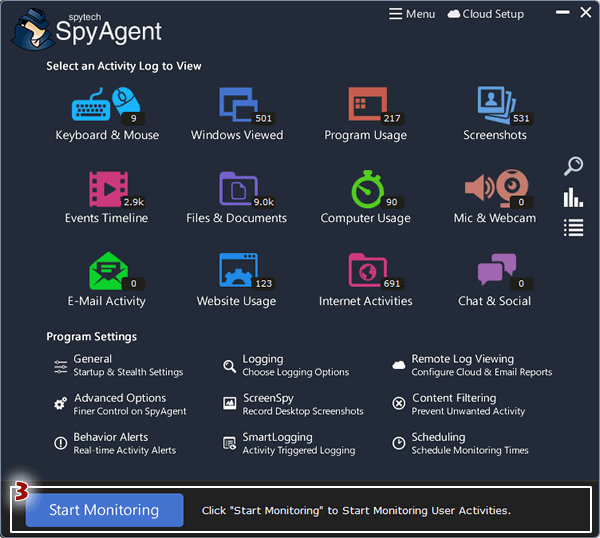
The highlighted area above signifies where you start/stop SpyAgent's monitoring.
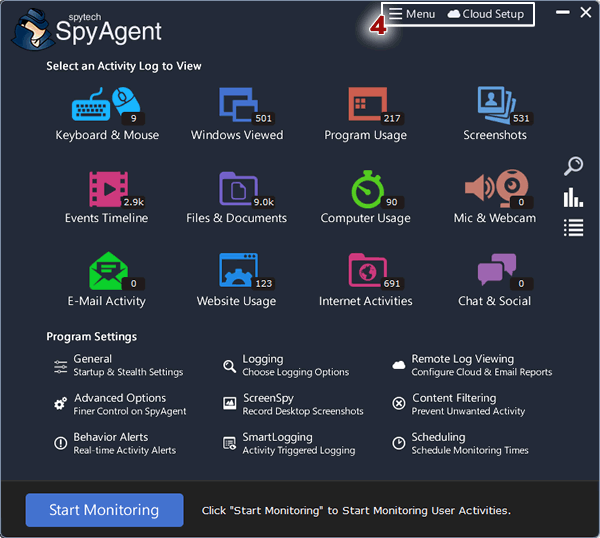
The highlighted area above signifies where you access more SpyAgent features. The "Menu" button will open a menu giving you access to all of SpyAgent's features and settings. The 'Program
Options' menu will allow you to access all of SpyAgent's options,
change your SpyAgent password, Import/Export settings, access Quick
Settings changes, and more. The 'Log Actions' menu allows you to
create activity reports, clear logs, filter logs, search logs, and
archive logs. The 'Help' menu allows you to view help documentation
and support information for SpyAgent. Activating and Deactivating Monitoring
To restart monitoring click on 'Start Monitoring' again. Note: If configured to run in stealth mode, SpyAgent's monitoring button will always show "Start Monitoring" when you bring it out of stealth mode with its hotkeys/nostealth.exe, as this stops monitoring in order to reveal the SpyAgent interface. Viewing Logs For further information on viewing and managing SpyAgent's logs please see the viewing logs section. Closing SpyAgent
|
